How to install your LED neon sign using our Mini Screws?
These screws typically come with signs that have a closely cut acrylic backing. Follow this simple 5 step process to learn how to hang a neon sign in minutes.
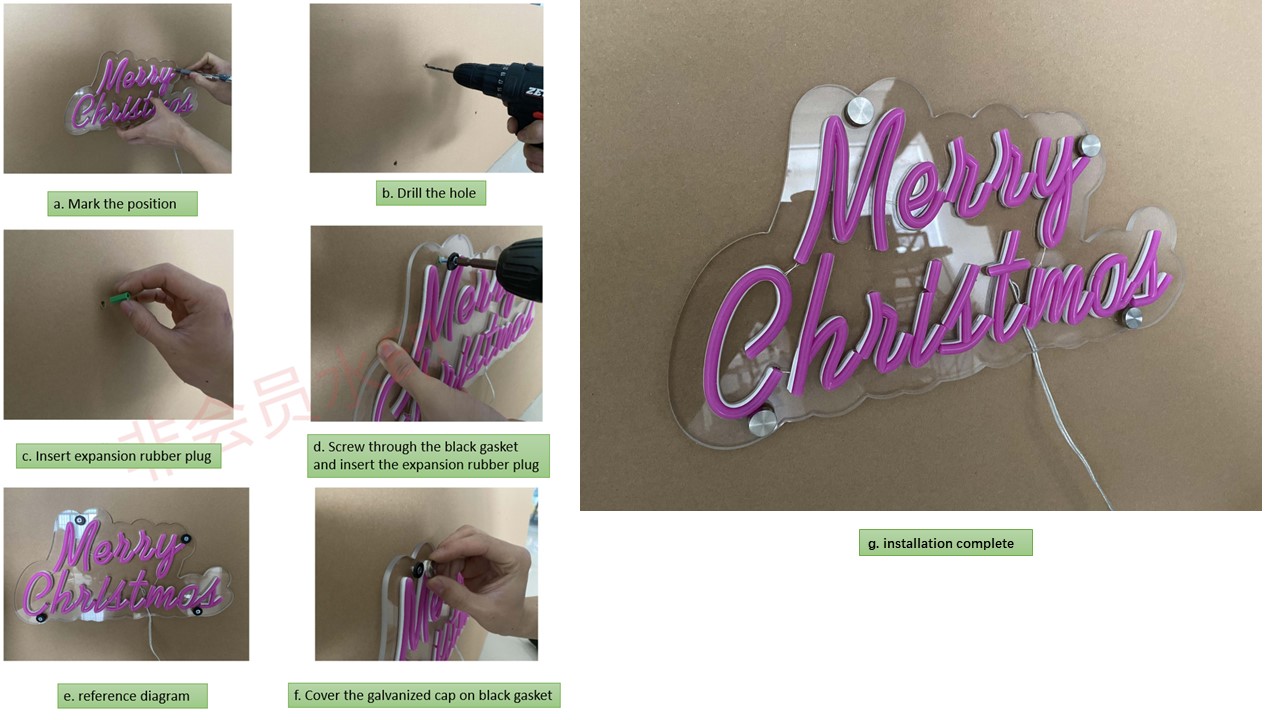
Step 1:
Lift only your neon sign and place it flat up against the intended wall or space. If it’s super long or heavy please ask a friend for assistance.
Step 2:
Decide where you’re going to be hanging the neon sign. While one person is holding the sign, use a marker pen to dot the pre-drilled holes in the wall where the screws will be going — this will be super helpful when you get the drill out next.
Step 3:
Place the sign back in the box or on a safe surface to avoid scratching the acrylic backing. Get your drill equipped with a smaller twist drill bit than the diameter of the screws and drill pilot holes exactly on the points you marked on the wall using your marker in step 2. If you don’t know how to use a drill, get a friend to help you with this part of hanging the neon sign.
Step 4:
Next, put the sign back up on the wall, and hold it in place to make sure your drilled holes and the holes in the acrylic backing match. Then take the black (or gold/silver) rubber washer and place it directly over your first hole. Then place the small silver screw through the holes. Grab your drill and drill the small screw through the acrylic hole into the pilot hole to secure the hanging neon sign.
Step 5:
Repeat step 4 until all screws are in place. Finally place the small silver end caps on top of the black rubber washers to complete the look.
Final Step:
Now plug the sign into the transformer (black or white box), and then into the wall outlet. It should illuminate no problem. And that’s how you hang a neon sign with mini screws!